{  Dining Out  }          {  Ingredients  }          {  Recipes  }          {  Blast from the Past  }            

Showing posts with label recipe. Show all posts

Monday, November 21, 2011

Ingredients: An Unlikely Place for A Sweetner

One of my favorite foods right now is Gyoza or Pot Stickers. I especially love the dipping sauce - a blend of 2/3 part Rice Vinegar and Soy Sauce with 1/3 part Chili Oil. Recently, I was surprised to find out the packets included with our Chinese delivery contained another ingredient.

I typically make our dipping sauce, except when I've run out of an ingredient and then use the provided packets. As I was tossing out the packets, I noticed Molasses as one of the ingredients. Boy was I surprised! I can't believe I never thought to check the ingredients before. The next time I order Pot Stickers at a restaurant and a dipping sauce is provided, you can bet I'm going to ask what's in their sauce.

Have you found sweeteners in odd places?

I've got a lot planned for this short Holiday week. Tuesday is all about toys, specifically those I grew up with and want to share with Gates. Wednesday, I reveal some of my best and worst experiences with Pot Stickers in the Bay Area. Thursday, I'll be back in the kitchen, bringing stuffing to our friends' Thanksgiving potluck, so you'll be treated to a recipe! Shocking, I know. And on Friday I'll share a couple more illustrations from The New Wolf in Chef's Clothing along with tips on entertaining.

Bon Apetit!
Eden
 
Credits: All images taken by Eden Hensley Silverstein for Recipes for the Good Life.

Thursday, November 10, 2011

Ingredients: What Do Balsamic Vinegar, Dijon Mustard, & Maple Syrup Have in Common?

These ingredients - Bistro Blends Heirloom Balsamic Vinegar, Maille Dijon Originale, and Noble Handcrafted Tuthilltown Bourbon Barrel Matured Maple Syrup - make up the most unlikely french fry dipping sauce I've tried while pregnant. I concocted it to satisfy a craving I was having for Rebel's Carolina Mustard sauce which unfortunately was off limits in my first trimester (cayenne).


Yep you read that right; cubes and I are expecting a baby girl this coming March.

Sweet Dijon Mustard French Fry Dipping Sauce (created August 6, 2011, 4:36pm)

  • Take 1 tablespoon Heirloom Balsamic Vinegar, 2 tablespoons Dijon Mustard, and 1/2 teaspoon Maple Syrup; blend thoroughly.

Over the next eighteen weeks, I'll be revealing my favorite pregnancy foods, catching you up on my recent food book purchases, and sharing the transformation of cubes' office (also known as the storage closet) into a nursery.

If you've been wondering why this blog went silent, now you know. I can't keep a secret and I was afraid I'd accidentally let our news slip if I continued writing. Sorry for keeping everyone in suspense. I promise it won't happen again.

Bon Apetit!
Eden
 
Credits: All images taken by Eden Hensley Silverstein for Recipes for the Good Life.

Wednesday, April 20, 2011

Blast from the Past: Toffee Bars

Holidays with gram meant cookies - a decorative tin filled with an array of homemade cookies. My favorite was always the toffee bars. The recipe remained a secret until I got my first place.

When I moved into my first apartment, my grandparents gifted me a 9-Speed Osterizer Blender (Model 647-04, Made in the U.S.A.). Along with this blender, purchased January 27, 1971 (almost as old as me!) came a cookbook: Osterizer Blender Spin Cookery Cookbook. In that booklet, tucked between pages 28 and 29, was a note from my gram, revealing her secret toffee bar recipe.

Ingredients (makes about 36 bars)

  • 2 cups Sifted Flour
  • 1 Egg Yolk
  • 1 teaspoon Vanilla Extract
  • 1 cup Butter, room temperature
  • 1 cup Brown Sugar
  • 1 cup Semi-Sweet Chocolate Bits
  • 1 cup Pecans

Instructions

  1. Heat oven to 350 degrees.
  2. Grease a 9'x13" pan.
  3. Sift flour into mixing bowl.
  4. Put Egg Yolk, Vanilla, Butter, and Brown Sugar into OSTERIZER container, cover, and process at BLEND until smooth. Use a rubber spatula to aid in processing. Add to flour and mix well.
  5. Spread in prepared pan and bake 25 minutes. Remove from the oven and sprinkle chocolate bits over the top, return to the oven for a few seconds to melt chocolate.
  6. When chocolate bits have melted, remove from oven and spread chocolate evenly over the cookies.
  7. Put half the nuts into MINI-BLEND container and process 2 cycles at GRATE. Sprinkle over chocolate. Repeat with remaining nuts.
  8. Cut into bars while warm. Cool in pan.
As soon as Passover is over, I'll whip up a batch of Eden-friendly (dairy and refined-sugar free) toffee bars for you. Oh, in case you're curious, I still have that Osterizer.

Wednesday, April 13, 2011

Rewind: Double Chocolate into Triple Chocolate

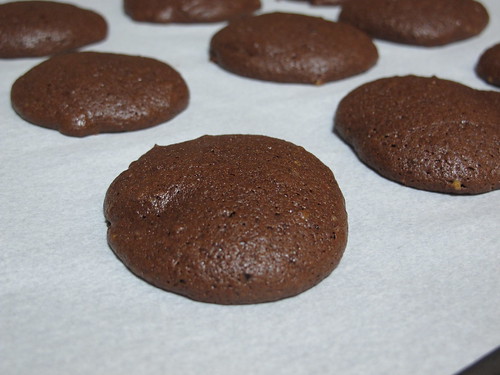
Last week I sampled Karen's vegan version of Tartine's Deluxe Double Chocolate Cookies and knew I had to try a refined sugar free version.

Triple Chocolate Cookies

The next time I make these cookies I'm going to create fudge-filled sandwiches. I'll also try using the bittersweet chocolate in place of the barley malt sweetened chocolate chips. I think the texture will be closer to the cookies Karen made.

Ingredients (makes about 3 dozen cookies)

  • 7 oz Barley Malt Sweetened Chocolate Chips, melted and cooled to room temperature
  • 1 cup plus 1 Tablespoon Flour
  • 1/2 cup plus 2 Tablespoons Cocoa Powder
  • 2 teaspoons Baking Powder
  • 1/2 cup Earth Balance
  • 1 cup Maple Sugar Crystals
  • 2 Eggs
  • 1/4 teaspoon Salt
  • 1 teaspoon Vanilla Extract
  • 1/3 cup Coconut Milk
  • 1 oz Cocoa Nibs
Instructions
  1. Position a baking rack in the center of the oven, preheat to 350 degrees.
  2. Sift together Flour, Cocoa Powder, and Baking Powder in a bowl. Set aside.
  3. Using a stand mixer, beat the Earth Balance until creamy. Stop the mixer and scrape down the sides of the bowl with a rubber spatula as needed.
  4. Add the eggs one at a time, mixing well after each addition until well incorporated before adding the next egg.
  5. Beat in the Salt and Vanilla, then add the melted Chocolate and beat until well incorporated.
  6. Add the Coconut milk and Cocoa Nibs and beat until combined.
  7. Finally add the Flour mixture and beat on low speed until incorporated.
  8. Drop the dough by heaping tablespoonfuls onto parchment paper, spacing them about 1 inch apart.
  9. Bake the cookies until they are just barely firm on top but are still very soft underneath, about 7 minutes. If your oven has hotspots, rotate the baking sheet about half way through the bake time. Do not overbake.
  10. Transfer cookies to a wire rack and let cool.
Credits: All images taken by Eden Hensley Silverstein for Recipes for the Good Life.

Wednesday, April 6, 2011

Planning: Sweet Treat for a Shower

Many times dairy-free cookies can end up dry. Monday night while attending Cafe Karen, a friend's weekly co-working event where friends can gather together while they work on individual projects, I tasted an amazing vegan cookie.

The source? An adapted recipe from Tartine.
Tartine's Cookbook
Deluxe Double Chocolate Cookie Recipe from Tartine's Cookbook
I'm going to adapt the recipe some more, substituting coconut milk for the Silk Creamer Karen used and keeping the eggs. I'll let you know whether or not my dairy-free cookie was hit next week.

While this cookbook isn't dairy-free it's on my must get list. Why? Wander down Guerrero in the Mission one Saturday or Sunday morning. As you near the corner of 18th and Guerrero you'll probably see a bakery packed with people waiting for freshly baked items. On a good day, the line only stretches 20 people out the door. Tried, true, popular recipes.

How do you choose your cookbooks?

Credits: All images taken by Eden Hensley Silverstein for Recipes for the Good Life.

Wednesday, March 30, 2011

What I Crave: Garlic Cheese Toast

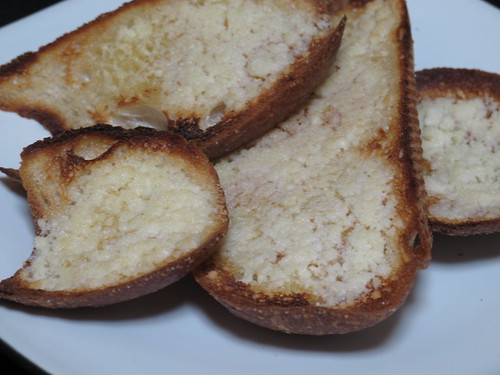
Whenever mom made spaghetti (which was at least every other week), we had garlic cheese toast. I serve it whenever I make spaghetti. I also make it whenever I need a pick me up or I'm craving salt.

Garlic Cheese Toast

With two exceptions, I make my toast the same way my mom did. I switch Earth Balance for butter and Pecorino Romano Grated Cheese for Kraft 100% Grated Parmesan. The key to this recipe is the double toast. You have to watch carefully as you're broiling or you'll burn the toast. I hope you enjoy it as much as I do.

Ingredients (for one slice)
  • 1 slice Sourdough Bread
  • 1 teaspoon Earth Balance
  • Dash Garlic Salt
  • 1 Tablespoon Pecorino Romano Grated Cheese

Instructions
  1. Place your oven rack at the topmost position in your oven. Set oven to Broil on High.
  2. Place your slices on top of a baking sheet. Lightly brown them.
  3. When slices are lightly brown, flip and brown the other sides. 
  4. When slices are golden brown, remove the baking sheet.
  5. Spread the Earth Balance on each slice, sprinkle a dash of Garlic Salt on each slice, and top with a Tablespoon of Pecorino Romano.
  6. Replace the baking sheet in the oven and broil until cheese is just melted.
Credits: All images taken by Eden Hensley Silverstein for Recipes for the Good Life.

Pantry Challenge: Cheesy Popovers

Over Presidents Weekend this past February, I decided to have a Pantry Challenge. Simply put in this challenge you can only use ingredients that are already in your kitchen. Preplanning meals and popping out to the corner store to pick up a missing ingredient are not allowed.

Overall we did pretty well. We had a dinner of Chicken Chili Soup with Popovers, Cinnamon Rolls with Maple Glaze, and Heart-Shaped Biscuits. Here's the last of the recipes from that challenge - the cheesy popovers. I started with a Breakfast Popovers recipe and adapted replacing skim milk with Soy Milk and adding the Pecorino Romano Grated Cheese to give the popovers a more savory flavor. If you're new to baking popovers, check out The Perfect Popover by Lynn Bonnett, she gives Tips and Tricks and explains how they work (steam).


Ingredients (makes 6 large popovers or 10 mini popovers)
  • 1 cup All-Purpose Flour
  • 1/4 teaspoon Salt
  • (Optional) 2 Tablespoons Pecorino Romano Cheese, grated
  • 2 teaspoons Canola Oil
  • 2 Eggs
  • 1 cup Unsweetened Soy Milk

Tip: Before I preheat the oven, I have all my ingredients assembled and ready to go. Soy milk and eggs are room temperature.


Instructions
  1. Position a rack near the bottom of your oven and preheat oven to 450 degrees.
  2. Grease popover pan with Earth Balance and preheat.
  3. In a medium mixing bowl, combine Flour, Salt, and Pecorino Romano Cheese.
  4. In another bowl, lightly beat Canola Oil, Eggs, and Soy Milk.
  5. Add a spoonful of the flour and cheese mixture to the soy milk mixture and mix.
  6. Slowly add the moistened flour and cheese mixture to the rest of the soy milk mixture and mix until smooth.
  7. Remove popover pan from oven and fill cups half-full.
  8. Bake for 40 minutes. Serve hot with a dab of Earth Balance.

NOTE: This recipe doesn't really work without a popover pan (yes in desperation I've tried it before). The individual wells are what gives the popover the crusty shell. I have two Chicago Metallic Non Stick 6-Cup Popover Pans. I don't recommend spraying the cups with Pam or something similar as it's a pain to clean off. Lightly coating the cups with Earth Balance works just as well and doesn't leave a sticky residue.

Wednesday, March 23, 2011

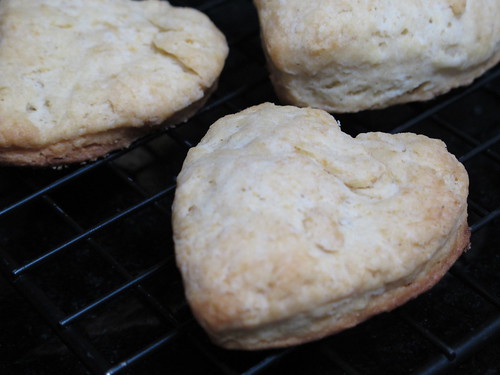
Blast from the Past: Heart-Shaped Biscuits

Heart Shaped Biscuits

One of my favorite cookbooks recently has to be my Betty Crocker's Picture Cook Book, First Edition, Fifth Printing c.1950. For February's Pantry Challenge I made two breakfast items from it - Cinnamon Rolls with Maple Glaze and these heart-shaped biscuits.

Ingredients (makes 20 biscuits)

  • 2 cups sifted Flour
  • 3 teaspoons Baking Powder
  • 1 teaspoon Salt
  • 6 Tablespoons Crisco Butter Flavored Shortening
  • 2/3 cup Unsweetened Soy Milk
  • 1/3 cup Earth Balance, melted

Instructions

  1. Position cooking rack in the center of your oven. Preheat oven to 450 degrees.
  2. Sift Flour, Baking Powder, and Salt together.
  3. With a pastry blender, cut the shortening into the flour mixture. 
  4. Stir in almost all of the Soy Milk. If the dough does not seem pliable, abdd the rest. Use just enough to make a soft, puffy dough easy to roll out. Too much Soy Milk makes dough sticky, not enough makes biscuits dry.
  5. Round up dough on lightly floured surface. Knead lightly.
  6. Roll dough or pat out (with floured hand) 1/4" thick for thin, crusty biscuits or 1/2" thick for thick, soft biscuits.
  7. Cut close together with a biscuit cutter or heart-shaped cookie cutter.
  8. Fit leftover bits together - do not reknead - pat out, roll smooth, and cut.
  9. Coat the bottom of a large cast iron skillet with roughy half of the melted Earth Balance.
  10. Add the cut biscuits to the skillet with edges touching; this gives your biscuits soft sides. Brush the remaining melted Earth Balance across the tops of the biscuits.
  11. Put skillet into preheated oven and bake at 450 degrees for 10 to 12 minutes or until tops are golden brown.

Wednesday, March 9, 2011

Recipe: Cinnamon Twist French Toast

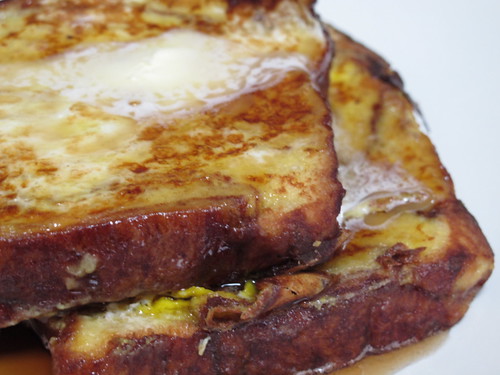
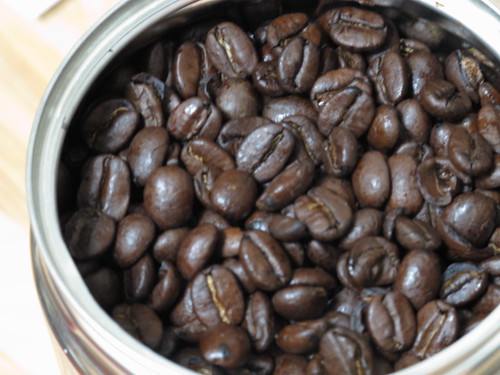
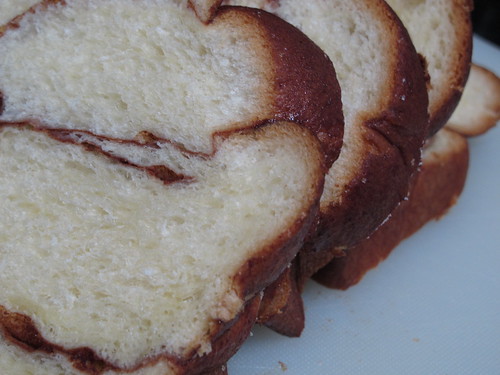
Yesterday, I teased you with a photo of Semifreddi's delicious Cinnamon Twist bread (my newest guilty pleasure). Today, I'll whet your appetite with a plate of French Toast and steaming hot, freshly pressed Illy coffee.

Cinnamon Twist French Bread

This French Toast recipe is a twist on my mom's recipe. Because I'm allergic to cow's milk, my mom started with day old sourdough (dairy-free and sugar-free) and dipped only in egg. She sifted powdered sugar and sprinkled cinnamon and nutmeg on the top of each piece. When I discovered soy milk I modified the basic recipe.

Ingredients

  • 4 large Eggs
  • 1/2 cup Wildwood Soymilk
  • 1/4 cup Orange Juice, freshly squeezed, not from concentrate
  • 2 teaspoons Vanilla
  • 1/2 teaspoon Nutmeg
  • 4 to 6 3/4" to 1"-thick slices of Semifreddi's Cinnamon Twist bread
  • 4 Tablespoons, Earth Balance, divided


Illy Coffee BeansFreshly Sliced BreadBreakfast in Bed

Instructions

  1. In a large rectangular casserole, whisk Eggs, Soymilk, Orange Juice, Vanilla, and Nutmeg.
  2. Add slices of bread and let soak for 5 to 10 minutes. Flip over the slices and bread and let soak for 5 to 10 minutes.
  3. In a large skillet over medium heat, melt 2 Tablespoons of Earth Balance and coat surface of skillet.
  4. Fry bread until light brown, approximately 2 to 3 minutes. Flip and fry the other side. When second side is light brown, remove and put in oven to keep warm.
  5. Melt remaining 2 Tablespoons of Earth Balance over medium heat and coat surface of skillet. Fry remaining slices of bread.
  6. To serve, top with melted Earth Balance and warmed maple syrup.

If you're curious, yes we really did enjoy this for breakfast yesterday. It wasn't all glamourous though. I spilled some of the coffee as I was trying to avoid SpriteKat.

Wednesday, March 2, 2011

Pantry Challenge: Chicken Chili Soup

As February wound down, I figured it was time for a pantry challenge, which I'll explain in a future post. It was also cold and wet so I wanted either a bowl of soup or chili with fresh bread.


With a pantry challenge you never know if you have all the necessary ingredients on hand. Last year we were able to make fresh cornbread with chili for a pantry challenge.

Ingredients (serves 6)
  • 2 cans (16 oz) Trader Joe's Low Fat Vegetarian Refried Pinto Beans Salsa Style
  • 2 cans (15 oz) Kidney Beans
  • 1 can Rotel Diced Tomatoes & Green Chiles
  • 1 can (12.5 oz) Trader Joe's Premium Chunk White Chicken in Broth
  • 1 Tablespoon Minced Onions
  • 1 Tablespoon Cumin
  • 1 teaspoon Chili Powder
  • 1 teaspoon Crushed Red Pepper
  • 2 Tablespoons Hot Just Veggies Freeze-dried Tomatoes and Chilies 
    Instructions
    1. In medium sauce pan, combine the contents of all cans. 
    2. Add spices and Freeze-dried Tomatoes and Chilies.
    3. Over medium heat, bring to a boil. Reduce to low heat, and cook for at least an hour.

    Monday, February 21, 2011

    Blast from the Past: Cinnamon Rolls with Maple Glaze

    Yesterday we brunched at Andy and Mella's. Continuing our Pantry Challenge, I whipped up Cinnamon Rolls from my Betty Crocker's Picture Cook Book, First Edition, Fifth Printing c.1950 (adapted by substituting Earth Balance for butter and Maple Sugar for Brown Sugar).

    The original recipe didn't include a glaze, but after cubes and I sampled one of the rolls, we both decided that something was missing.


    Ingredients (20 - 1 3/4" biscuits)
    • 2 cups sifted All Purpose Flour
    • 3 teaspoons Baking Powder
    • 1 teaspoon Salt
    • 6 Tablespoons Crisco
    • 2/3 cup Soy Milk
    • 2 Tablespoons Earth Balance, melted
    • 1/4 cup Maple Sugar
    • 1 teaspoon Cinnamon
    For glaze:
    • 1/2 cup Earth Balance
    • 1/4 cup Maple Sugar
    • 2 Tablespoon Maple Syrup
    • 1 Tablespoon Coconut Milk
    • 2 teaspoons Corn Starch 

    Instructions
    1. Position a rack in the center of the oven and preheat oven to 425 degrees.
    2. Combine Flour, Baking Powder, and Salt.
    3. Cut in Crisco finely.
    4. Stir in Soy Milk.
    5. Round up on lightly floured board.
    6. Knead lightly.
    7. Roll dough 1/4" thick into 7"x16" rectangle.

    8. In a small bowl, combine 1/4 cup Maple Sugar and 1 teaspoon Cinnamon.
    9. Add 2 Tablespoons melted Earth Balance to Maple Sugar and Cinnamon mixture. Blend thoroughly.
    10. Spread rolled dough with melted Earth Balance, Maple Sugar, and Cinnamon mixture.
    11. Roll up tightly beginning at the wide side.

    12. Cut into 1/2" slices, placing cut-side down on baking sheet.
    13. Bake at 425 degrees about 15 minutes. When done cool for 5 minutes on wire rack.
    14. For glaze, on medium low heat, melt Earth Balance. Add Maple Sugar and Coconut Milk. Dissolve Corn Starch in Maple Syrup and add. Stir constantly until mixture comes to a boil and thickens.
    15. Stack rolls in a pie plate. Drizzle glaze over the top.

    Tuesday, February 15, 2011

    Recipe: Dairy-Free Molten Lava Cake

    My husband woke up on Valentine's Day not feeling well. The day before I'd had plans of baking a cake; something he was really looking forward to. So, last night while we waited for Chinese food to arrive at our doorstep, I baked him his Valentine's Day gift.


    Because you need to harden the ganache, this recipe takes about 40 minutes from beginning of prep time to plating. I made the recipe in stages. Completing steps 1 and 2 before our dinner arrived and finishing up step 3 as cubes plated our dinner. I didn't preheat the oven or mix the batter until after we finished our dinner.


    I wanted to present cubes with heart-shaped cakes. (The Chocolate Ganache Heart Cakes recipe from Williams-Sonoma I started from had a photo of heart-shaped cakes.) While I used to own a heart-shaped baking pan (never used it), I don't now. My plan was to use a cookie cutter (wedding favor from Cat and Becks' wedding) to shape the cakes. When the cakes came out of the oven and stuck to the nonstick popover pan I used, I realized they couldn't be cut neatly. Most of the cakes landed in tact on the wire rack. The tops of two of the cakes fell through the wire rack onto the counter.

    Did your Valentine's day go as planned? Or, like me, did you punt?

    Monday, February 7, 2011

    Recipe: Vanilla Maple Pecan Chip Vegan Ice Cream

    On Saturday I finally got around to attempting the next batch of vegan ice cream.
    Vanilla Maple Pecan Chip Vegan Ice Cream
    I started with a Vanilla Vegan Ice Cream recipe from Elana's Pantry and adapted widely.

    I really wanted ice cream so I didn't let the fact that we did not have cashews in the house deter me. I substituted pecans. With the exception of cashews, I had all the ingredients the original recipe called for. However, I prefer the taste of maple syrup to agave nectar and wanted a creamier ice cream (hence the substitution of coconut milk for water.) 

    Overall, I was happy with the taste. The texture though was another story. We avoided the dreaded ice crystals but the ice cream isn't really cohesive.

    Do you have any tips for getting a creamy vegan ice cream without ice crystals?

    I'm going to try this recipe again with three changes:
    1. Churning the ice cream for 30 minutes instead of 45 minutes.
    2. Grinding the nuts finer.
    3. Using water as called for by the original recipe.
    If you try this recipe, or have suggestions for improving it, please share.

    Thursday, December 23, 2010

    Recipe: Blanchisserie Americain's Amuse Bouche

    It's been awhile since we posted any recipes. Today we share the recipe for the amuse bouche that Blanchisserie Americain had planned to serve guests at the soft open this past Saturday.

    Our recipe was adapted from Chef Elissa Rubin-Mahon's Porcini Cracker Bread recipe and Marinated Roasted Pepper Salad, Peperonato, and Red Pepper Coulis recipes from The Art and Craft of the Cold Kitchen: Garde Manager, 3rd Edition.

    Bon apetit!

    Roasted Bell Pepper with Porcini Cracker Bread
    Ingredients

    • 1 pkg fresh whole wheat lavosh (six 9" x 12" sheets)
    • 1/4 cup extra virgin olive oil
    • 1/4 cup porcini powder
    • 3 tsp sea salt
    • 4 oz red bell peppers, roasted, peeled, seeded, and diced
    • 2 oz shallots, minced
    • 4 fl oz olive oil
    • 12 fl oz dry white wine
    • 6 fl oz chicken demi-glace
    • Sea salt to taste
    • 2 fl oz olive oil
    • 5 oz onions, thinly sliced
    • 1/2 oz garlic cloves 
    • 1/2 tsp dry oregano
    • 1/2 tsp red pepper flakes
    • 1 lb yellow bell peppers, cut into julienne
    • 1 lb orange bell peppers, cut into julienne
    • Sea salt to taste
    • Ground black pepper to taste
    • 1 fl oz olive oil
    • 1/8 bunch thyme, leaves only
    • 1 lb zucchini, thinly sliced rounds
    • 1/4 c pine nuts, roasted
    • 1/4 lb Fiore Sardo
    Instructions

    1. Preheat oven to 350 degrees F, convection setting if available.
    2. Lightly brush the entire top surface of a lavosh sheet with olive oil.
    3. Dust surface with porcini powder.
    4. Cut lavosh into 1-inch squares.
    5. Place lavosh squares in oven on wire rack.
    6. Bake for 5 to 6 minutes or until the lavosh is just crisp and beginning to show color.
    7. Remove from the oven and sprinkle sea salt to taste.
    8. Prepare Roasted Red Pepper Coulis:
      1. Saute the peppers and shallots in the olive oil until they are tender.
      2. Deglaze with white wine.
      3. Add the chicken demi-glace.
      4. Place the mixture in a blender and puree until smooth.
    9. Heat the olive oil in a saute pan over medium heat.
    10. Add the onions and saute, stirring occasionally, until tender and translucent with no color, about 8 minutes.
    11. Add the garlic, oregano, and red pepper flakes, saute until aromatic, about 1 minute.
    12. Add the peppers and continue to cook, stirring from time to time, until the peppers are soft and tender, 5 to 6 minutes more.
    13. Taste and season with sea salt and pepper.
    14. Simmer over low heat until flavorful, stirring as necessary to avoid browning the mixture, about 15 minutes.
    15. Serve immediately or cool, cover, and refrigerate up to 5 days.
    16. Combine olive oil with thyme.
    17. Brush zucchini with olive oil and thyme.
    18. Broil zucchini until tender and very hot.
    19. For assembly:
      1. On top of Porcini Cracker, arrange 1 slice zucchini.
      2. Drizzle with Roasted Red Pepper Coulis.
      3. Add 4 to 6 slices of sauteed bell peppers.
      4. Add a couple of roasted pine nuts.
      5. With carrot peeler, shave Fiore Sardo and top each bite.

    Wednesday, October 27, 2010

    Recipe: Chicken with Lemon Caper Sauce


    This past weekend at MooflyFoof and EdRabbit's wedding we had a Dairy-Free Chicken Piccata. And if you remember, cubes and I had Dairy-Free Roasted Chicken with Lemon Caper Sauce. For our first homecooked meal since we said "I Do" it seemed only appropriate to try our hand at a dairy-free chicken with lemon caper sauce (aka Chicken Piccata).

    Our first attempt at the Chicken with Lemon Caper Sauce was a little too lemony and a tad too thick. We also discovered that the halved chicken breasts from Bi-Rite Market were approximately 8 ounces each rather than the 5 to 6 called for in the recipe. Thankfully we had a meat thermometer so that we were able to accurately gauge when the chicken was safe to eat.

    Chicken with Lemon Caper Sauce

      This recipe was adapted from Sparow64's, Taste of Home's, and Fitness Magazine's Chicken with Lemon Caper Sauce recipes, as well as TLC's Chicken Scallopini with Lemon-Caper Sauce recipe.

      Ingredients (Serves 4)
      • Pinch of Salt (1/4 tsp) and Pepper (1/16 tsp)
      • 1/2 cup All-Purpose Flour
      • 4 (5 to 6 ounces each) Skinless, Boneless Chicken Breast halves
      • 3 Garlic cloves, minced
      • 2 Tbsp Del Papa, Cold Pressed EVOO
      • 1/4 cup Benziger Signaterra Savignon Blanc, Casey's Block 2009, or Dry White Wine
      • 1 Tbsp Cornstarch
      • 3/8 cup Fresh Lemon Juice (1 1/2 medium size lemons)
      • 2 Tbsp Earth Balance
      • 2 Tbsp Agostino Recca Capers in Salt, rinsed and drained
      • 4 Tbsp Fresh Parsley, chopped
      • Lemon slices
      Instructions
      1. Preheat oven to warm or 200 degrees.
      2. In 1-gallon ziplock bag, add salt, pepper, and flour. Shake until well mixed.
      3. Place chicken breasts, one at a time, between sheets of wax paper. Pound to 1/4-inch thickness.
      4. Add chicken to salt, pepper, and flour mixture, and shake bag until chicken is well coated.
      5. In a saute pan (we used our 12" Everyday Pan as we don't own any saute pans) heat EVOO over medium-high heat.
        NOTE: Do not use a nonstick pan.
      6. Cook garlic over medium-high heat for 1 minute.
        NOTE: Do not let the garlic brown.
      7. Shake excess flour from chicken and with tongs place chicken into pan.
      8. Brown chicken in hot EVOO until both sides are golden-brown, approximately 3 to 4 minutes per side or until a meat thermometer reads 170 degrees.
      9. When chicken is done, inside is white and firm, remove from pan to baker. Cover with foil and place in oven to keep warm.
      10. Juice two small or one and a half medium-sized lemons, approximately 3/8 cup lemon juice.
      11. Whisk the cornstarch and the lemon juice until smooth. Set aside.
      12. Pour white wine into the pan and allow to boil.
      13. Stir continuously until the drippings from the chicken are incorporated.
      14. Add the Earth Balance and stir until melted.
      15. Add the cornstarch and lemon juice mixture to the white wine sauce.
      16. Allow to return to a boil.
      17. Cook and stirl for a few minutes until the sauce has thickened. Remove from heat.
      18. Stir in capers and parsley.
      19. Return the chicken to the pan, turning to coat.
      20. To serve, plate the chicken, pour lemon-caper sauce over each breast, and garnish with lemon slice.

      Friday, October 15, 2010

      Guestbook Recipe: Velvet Crush

      This past Sunday cubes and I got married. Being foodies, instead of a traditional guestbook, we asked our guests to bring and share with us their favorite recipes. As we try our hands at these recipes we'll be sharing the results here with you.

      To kick off this series and to celebrate our first weekend as husband and wife, we're going to feature a drink recipe. Hope you enjoy it. I personally can't wait to try it.

      Velvet Crush
      Shared by Nathan Hunsperger

      Ingredients

      • 2 shots Organic Vodka
      • 1 1/2 shots Cucumber Juice
      • 1/2 shot Grapefruit Juice
      • 1/2 shot Falernum
      • 1/2 Lime
      • 2 Sage Leaves

      Instructions

      • Combine in shaker and serve in chilled glass.

      Before this recipe, I hadn't heard of Falernum. A quick Google search solved the mystery.
      "Falernum is a flavored syrup that originated in Barbados.  From there it gets a little hazier.  Falernum can be alcoholic or non-alcoholic.  It generally contains ginger, cloves, and lime, but could include any number of other ingredients for flavor.  Most recipes include some sort of bitter almond flavor.  It is typically yellowish in color, but not necessarily (Source with recipe)."
      Everyone ready now? OK then. Raise your glasses and toast.
      Mazel Tov! 


      Have a great weekend. We sure will. 

      Monday, August 30, 2010

      Recipe: Mixed Berry Vegan Ice Cream

      Cross-posted at A Timeless Affair - A Romantic Vintage Wedding

      This past weekend we finally tried out another of our registry gifts. This time the Cuisinart ICE30-BC Ice Cream Maker. Two first impressions:
      • It's noisy when it's running. Maybe this was because we ran it on our granite countertop.
      • Vegan ice cream is not firm enough to eat after 20 to 25 minutes. You do need to refrigerate it the recommended additional 2 hours.
      Mixed Berry Ice Cream:
      Vegan, Gluten-Free, Refined-Sugar Free 

      Adapted from the Strawberry Vanilla Ice Cream recipe that I found at Elana's Pantry.
      Ingredients
      • 5 oz Blackberries, fresh, deseeded
      • 5 oz Blueberries, fresh
      • 13.5 oz Coconut Milk
      • 1/4 cup, Agave Nectar
      • 1 Tbsp Vanilla Extract
        Instructions
        1. Wash and dry the blackberries and blueberries.NOTE: If you don't remove the seeds from the blackberries, your ice cream won't be smooth.
        2. Blend blackberries, blueberries, coconut milk, agave nectar, and vanilla extract in blender.NOTE: If you forget the vanilla, the ice cream will have a coconut flavor. These proportions neutralize the coconut and bring the fruit forward.
        3. Remove frozen freezer bowl from the freezer. Place freezer bowl on the center of the base.
        4. Place mixing arm in freezer bowl.
        5. Place lid on base.
        6. Turn the ice cream maker on.
        7. Pour blended mixture into the freezer bowl.
        8. Mix until thickened, about 20 to 25 minutes.
        9. Transfer the ice cream to an airtight container.
        10. Place in freezer for 6 to 8 hours. Remove 15 minutes before serving.

          Wednesday, February 17, 2010

          Blast from the Past: Traveling to the 1950s to Bake a Cake


          Originally posted on LiveJournal.
          Today I traveled far and wide as I rode BART from 16th Mission to Pleasant Hill. I flipped through the pages and recipes of a cookbook from 1954. I could imagine a "Donna Reed"-styled homemaker busy preparing these dishes for fellow transplants.
          When things get hectic, I tend to get stressed out. Growing up I would deal with stress by traveling to faraway places in my head. More recently I would deal with stress by retreating into my nest or taking off in Ghost. While hiding out in my nest, I would cook or bake. For those who always wondered how I had a freezer full of prepared lunches and dinners now you know. Today was another stressful day - especially for a perfectionist. Nothing I did at work today met my internal standards. So, wanting to accomplish at least one thing and do it well, I felt compelled to bake.
          One of the themes at our wedding involves cooking, which both cubes and I enjoy. Highlighting our combined love of cooking and the women who influenced my cooking led to a search for those tomes I grew up with. My paternal grandmother traveled a lot with her husband who ran a travel agency specializing in the Far East. From her and my aunt my love of the Orient was born. One cookbook I came across while helping clean out her storage was Rangoon International Cook Book published in 1954 by The Women's Society of Christian Service of the Methodist English Church, Rangoon, Burma. My grandfather's favorite place to visit was Bali and growing up I frequently confused Burma and Bali. For this reason, I thought it only fitting to flash back to the past to make a Dairy-Free Chocolate Cake (recipes in the late 50s frequently used shortenening in place of butter) from a cookbook produced in Burma.
          Luckily cubes helped me with the cake as I misread teaspoons of vinegar as tablespoons. So far the cake looks good, rising nicely. We'll know for sure whether the effort was a success in about 5 minutes when the cake comes out of the oven. Keep your fingers crossed!

          Monday, January 18, 2010

          Family Style: Jalapeno Meatloaf

          Many meatloaf recipes can end up dry and not very appetizing. Also there are many meatloaf recipes that call for milk or use fresh breadcrumbs from white or wheat bread - both of which are made with milk. Always on the lookout for dairy-free entrees with a zing, I experimented one night by converting Rotel’s Jalapeno Meatballs into meatloaf. The original recipe used cracker crumbs for which I substitute breadcrumbs made from day old Italian Batard or Sourdough.

          Ingredients (makes 2-4 x 8 loaves)
          • 2 lbs Ground Chuck
          • 1 can (10 oz) Rotel Diced Tomatoes and Green Chiles
          • 2 cups fresh Italian Batard or Sourdough Breadcrumbs
          • 1/2 cup Onion, finely chopped
          • 1/4 cup Jalapeno Peppers, seeded and chopped
          • 1 Tbsp Garlic Powder
          • 1/2 tsp Sea Salt
          • 1/2 tsp freshly ground Black Pepper
          • 1/2 cup Westbrae Fruit-Sweetened Catsup
          Instructions
          1. Preheat oven to 400 degrees.
          2. In large mixing bowl, combine all ingredients but the catsup.
          3. Divide into 2 balls.
          4. Place in 9x13 baker and shape into 2 loaves.
          5. Brush loaves with catsup.
          6. Bake 15 minutes at 400 degrees.
          7. Rotate loaves and bake another 15 minutes.
          8. Cover loaves and bake for another 15 to 30 minutes or until done. Test with meat thermometer to ensure meat has reached an internal temperature of at least 140 degrees.

          Family Style: Eden’s Pink Palace Meatloaf

          After I graduated from Santa Clara, I came to share a house in Cupertino with 6 others. We dubbed our place “The Pink Palace” as it was shockingly pink. It had a very small kitchen and with 4 of us who liked to cook a system had to be devised to avoid chaos. The system basically came down to once a week a member of the house would cook or grill dinner for all the residents. My night was Wednesday so I tried to keep my meals easy to prepare and typically made Spaghetti. The house rapidly tired of spaghetti and revolted, leaving me one night with ground sirloin and hungry mouths to feed. This tangy moist meatloaf was the result.

          Ingredients (makes 2-4 x 8 loaves)
          • 2 lbs Ground Sirloin
          • 4 Celery stalks, finely chopped
          • 1 large Onion, finely chopped
          • 3 cups fresh Italian Batard or Sourdough Breadcrumbs
          • 3 Eggs
          • 1 cup Stubb’s Smokey Mesquite Bar-B-Q Sauce (original recipe used Whole Foods Tangy Barbeque Sauce)
          Instructions
          1. Preheat oven to 400 degrees.
          2. In large mixing bowl, combine all ingredients.
          3. Divide into 2 balls.
          4. Place in 9x13 baker and shape into 2 loaves.
          5. Bake 15 minutes at 400 degrees.
          6. Rotate loaves and bake another 15 minutes.
          7. Cover loaves and bake for another 15 to 30 minutes or until done. Test with meat thermometer to ensure meat has reached an internal temperature of at least 140 degrees.
          Related Posts Plugin for WordPress, Blogger...